Pages

Tuesday, July 17, 2012

Goin' on a VACA & Giving YOU a GIVEAWAY!


Tomorrow, after my 3rd straight day of summertime workshops, I'm heading out to the fabulous Cedar Creek Lake for a little mini vaca.  (For those of you who aren't from Texas, or even if you are and you don't know, Cedar Creek Lake is near Gun Barrel City and Mabank...which are amazingly trashy, country bumpkin' towns!)  I'm traveling with my mother to see her sister (my aunt) for her birthday.

Let me backtrack so you don't think I'm the meanest, most judgemental person ever.  Really, I don't mean it negatively that I'm going to a trashy, country bumpkin' town.  I'm REALLY SUPER EXCITED!  It's an AWESOME place to do some major "junkin'"!  My mom and I are definitely going to gather some fun stuff for our new Teapots & What-Nots!  (Which, by the way, we will need to, because we are for sure getting a booth at McKinney Trade Days next month!  Woo-Hoo!)

So, in honor of my whimsical junkin' weekend (and the fact that I finally finished one of my TpT packs that has been hangin' out on my computer for MONTHS now...really...it has...) I'm throwing a GIVEAWAY!!!  YAY!!!

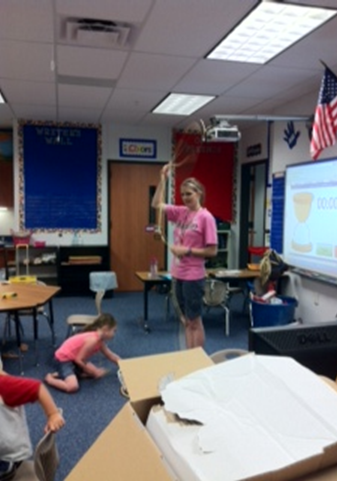
Ready for the prizes?  First up is my NEW "1, 2, Measure With My Shoe!" TpT Pack!  Yes, it did take me about 3 months to finish...my ADD was really bad with this one...but it's finally done! 

This is a cute little project that I used with my kiddos last year, but I was trying to spruce it up a bit before I posted it online.  So yes, it took me a while, but it is tried and true, and I love it!  I hope you will, too!

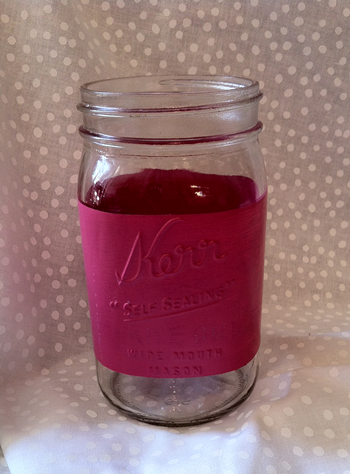
The next prize is a fun set of 4 ADORABLE Chalkboard Clothespin Labels from our Etsy store, Teapots & What-Nots!  The winner of the giveaway will get to tell me what *CUSTOM* colors she wants!  How fun and special is that?!  :)


So, now are you ready to enter?  There's 3 ways below, one of which is a daily (if you so should choose!)  I'll be back home on Sunday, and the drawing will end shortly after.  Good luck!  I'll be thinking about y'all while I'm on my mini-vaca!  :)

a Rafflecopter giveaway

Sunday, July 8, 2012

Miss Me? Look What I've Been Up To...


Man, I feel like this summer has gone by so fast!  I also feel like I've barely posted!  (Well, it's more than a feeling, it's actually the TRUTH!  I HAVE barely posted the past month or so!)

I promise I haven't dropped off the face of the earth or joined a cult.  No, no, I've just been SO busy!!!  Curious as to what I've been doing?  Well, you already knew about the summer camp last week...but other than that, I've been starting a little side business with my mom!  How fun is that!  :)

We have combined her vintage collectibles with my upcycled and refinished furniture and decor to create our store: Teapots & What-Nots!  Back in June, we got a small booth at a local antique mall, but now we also added a shop to Etsy!  Here's a quick sampling (there's more at our Etsy shop) of what we have posted online so far....


You like?  It's very eclectic, but it's stuff that both of us LOVE and would have (or have had) in our own homes!  I'm even tempted at times to keep some of the things I make...like the vanity stool...love love love it, but no where for it!

So, on top of teaching, tutoring, and TeachersPayTeachers, now I have this, too!  Whew!  I swear, I really must be crazy (or just extremely ADD)!

But, I promise I'm still working to create lots of new goodies to post to TpT as the summer winds down a little bit.  There's one math pack/homework that I'm especially excited about, but you'll just have to wait until I post it!  :)

So, are you ready to help me out, and I'll help YOU out, too??  Of course you are!!   Ready?  Well I know probably EVERYONE out there (except for my mother) has a Pinterest account.  So, let's make a trade!  Here's what I'm thinking:

Step One:  Pin one of my items from my Etsy store to help my wonderful mother and myself out. 

Step Two: Then, stop by my TpT store and browse through my "Dollar Deals" (items that are $1 or less online). 

Step Three: Come back here and leave me a comment.  In your comment, leave me the link of your Pin.  Also, tell me what item you would like from my "Dollar Deals" (yes, it must be $1 or less).  Finally, tell me where to send it!

Step Four:  That's it!  :)  But you have to hurry, because my deal only lasts until Wednesday morning (July 11) at 9 AM! 

Think you can help me out?  I'd SO appreciate it!  Thank you Thank you Thank you in advance!  You guys rock!  Happy Sunday!!!!

Wednesday, July 4, 2012

Happy 4th of July SALE for YOU & a BREAK for ME


Woo-Hoo!  It's the 4th of July!  Can you believe it??

I honestly cannot.  My, how time flies (wow, I sound old typing that)!!! 

I'm sure we're all super busy today-- out celebrating, cooking up some bbq, lounging by the pool, and all in all, just taking some time off.  I know that I, for one, am glad to have some time off!  This week, I've been teaching a summer camp in our district.  It's a new experience, and let me just tell you how eye opening it's been!

Our camp is called "Adventures for Lil' Buckaroos"...it's a cowboy themed camp for 4-5 year olds!  Yes, that's right...FOUR and FIVE year olds!!!  (Remember, I teach 2nd grade!!)  It is a whole different world!!!!  Luckily, I have a co-teacher, my friend who used to teach 2nd grade with me a few years ago.  Because let me just say, I don't think I'd make it by myself.  I never, ever, never, ever realized just how needy the youngin's are!  Aye aye ay!  I was NOT prepared for crazy bathroom experiences (like a boy peeing off the playground ledge) nor was I prepared for all the whining and the fits (like having to come inside to eat lunch).  But really, it has been fun, and I'm glad I've gotten to enjoy it with my friend, Andrea.  In fact, here she is teaching the kiddos how to "lasso"  :)

P.S.- She'd TOTALLY kill me if and when she realizes I put this picture up here!!!


So, needless to say, I'm excited about my day off from camp.  Yay for a break!!!  And, in honor of my excitement, oh, and the fact that it's our nations independence day, I'm throwing a 20% off sale in my TpT store!  Don't worry about having to catch it today, though.  I know lots of us are out and about, so it will run from today through tomorrow evening.  Be sure to stop by and pick up some fun goodies! 

Oh, and be sure to wish me luck tomorrow and Friday.  Hopefully I can put on a happy face and make it through my last 2 days with my itty bitty cowboys and cowgirls!!  :)

Happy 4th!!!

Thursday, June 28, 2012

Chalkboard Mason Jars!


Okay, so I've made my book labels, given my chalkboard a face-lift, and now, I'm on to my next project: chalkboard mason jars!  This is a super cute and EASY project that I can't wait to take back to school.


Here's your supply list:
-Glass Mason Jars (I used 2 different kinds and sizes.  You can pick these up at grocery stores, garage sales, or even in a 12 pack on Amazon!)
-Blue Painter's Tape
-Small-ish Paint Brush
-AND, of course, Chalkboard Paint! 


Yes, I will admit, I have become a bit intrigued...no no, more like obsessed...with chalkboard paint lately...but look, I've now found COLOR chalkboard paint on Amazon:


So, the first step, just like with the chalkboard upcycling, is to clean your surface.  I snagged my jars at a garage sale, so they were a bit dusty.  I soaked them in some hot, soapy water and gave them a good scrub.  Then, I let them air dry for a few hours.

Next, tape off the area that you would like your paint to go in!  You will see that one of my larger jars has the paint ALL the way around, and the smaller one just has a square.  It's totally up to you!
My smaller jar, taped off.

Now, take your brush and put on your first coat.  As a quick little tip, chalkboard paint is water based and does clean up easily IF you don't leave it.  Another way to help with easy clean up (and a trick I've learned) is to wet your brush FIRST before you use it!  This helps the paint not seep INTO the bristles and make cleaning it out harder.  :)

Okay, after your first coat, LET IT DRY!  I made the mistake of putting on my 2nd coat too quickly, and it just caused my first coat to get all goopy and gross (so I had to take it off and start over!)  When I restarted, I let my 1st coat dry a good few hours before reapplying.  Eventually, I ended up putting 2 coats of the pink on and 3 coats of the black.  I guess it just depends on the paint and how thick you're painting the coats on!

When your paint is finally done, remove your tape, and hopefully you'll have "clean" edges!  (Don't worry if you had some paint leak under the tape...you can just scrape it off with a razor or sharp knife!) 


For a fun finished look, add some ribbons!  After much debating, I decided on a brown to compliment my pink jar:


AND, here's the best part!  It's "self-sticking"!  The cute fabric ribbon has tape on the back, which made this whole process EVEN easier!  (As a side note, I did order this ribbon in a few different colors from Mindy Mae's Market, a SUPER whimsical site with great prices!  Check it out!)  I just cut 2 equal sized pieces, peeled off the back, and wrapped it around:


Just had to show you the other colors I bought from Mindy Mae's!  Haha, I LOVE that site!

I also added striped ribbon to my handled jar.  As a tip, that I had to learn the hard way, be aware of the handles!  I didn't even think about them as I started my ribbon, but once I got to them, I had a bit of an "uh-oh"...but I don't think anyone will even notice!  BUT, just be aware as you're painting and such!  Plan ahead!  :)

So there you have it!  A chalkboard mason jar, that you can label, store things, and even relabel as you organize throughout the year.  I have so many ideas to use these for, besides "pens" haha!  Think about it...lunch count...behavior jars...rewards...picking random students' sticks....craft supplies...sharp/dull pencils...the list goes on and on!


Didn't I tell you it was easy!  And oh so practical!  And, did I mention, it's fun?!  :) 
 
You can check out this DIY and LOTS more over at the "Monday Made-It" Linky:


Enjoy!!!!

Wednesday, June 27, 2012

Alan November Workshop Taught Me About ONLINE TUTORIALS!


ONLINE TUTORIALS!!!  Wait, why is that in all caps, you may ask?  Because, I'm SO excited to share these with you!

Let me first back track and appologize for just now posting this.  My plans were to create this post earlier LAST week, HOWEVER, for this amazing new tool, I did need a microphone for my computer.  (Which, I thought I had one, but after digging and digging, it was no where to be found!)  So, I ended up getting a cheap one from a cheap store, but it is just an "old school" mic that you would use with a PA system or if you were performing in a band . . .
                                a little like this   -------------->

What I WOULD suggest (and I'm going to ask my principal if we have $20 to spare) would be a mic that sits on the desk, so you don't have to waste a hand to hold the mic.  That was one of my biggest struggles while recording, and I especially for children, it may be difficult.  This is what I have in mind (that hopefully would be MUCH easier):


Okay, now that my rant is over, let me let YOU listen to this brand new online tutorial ABOUT online tutorials, using a new (to me) program, Jing!


Pretty neat, huh?  I'm very excited to share this with my kiddos next year.  I think these tutorials can be GREAT for all levels of students.  Here's how:

  • It will provide enrichment to your higher level students.  They can create tutorials about current topics and subjects in class.  After all, they say you don't really TRULY understand something unless you can teach it yourself!   

  • It will provide opportunities for lower level students to hear another student's perspective on things.  They may have an "aha" moment after listening to Bobby or Jody teach them from the video. 

  • It will provide yet another techology "outlet" for your students to explore and learn with!  (After all, like I mentioned in an earlier post, our students will be reading and learning more on the internet than from school and/or books in their lifetimes!) 

  • It creates a "stage" for students in our classrooms!  No longer are students simply creating work for the teacher's eyes only (because let's face it, that's normally what we expect...our students to do their best work on something for only our eyes to see, grade, and give back).  Now, though, students will be accountable for something even bigger!  Children can ultimately share their work with the whole world (depending on how private and/or public you set the videos)!  Through online tutorials, we can "create creators", and every classroom can be an auditorium-- because now your students will know that eyes other than YOURS will see their hard work and creativity!

So, go play around with it!  Try it out, experiment over the summer, and get comfortable with it!  I'll have to admit, I'm still learning LOTS about it, but my goal is to be a PRO at it by the end of the summer, so I'll be ready to use it with my kiddos once the new school year begins.  (I'm envisioning LOTS of video topics, not just math!)

Here are a few links to some websites that have examples of online tutorials that we can use in the classroom:
  • Mathtrain TV: The site I showed in my Jing video above.  Real tutorials made by kids!
  • Khan Academy:  A site I've mentioned before, has many many video tutorials for ALL levels.  Sal Khan creates and records all videos.
  • Always Learning:  Has a great article of her students online tutorial project.
  • And I'm sure there are LOTS LOTS more, if we just search!
Okay, so I'm wondering now that you've made it through...what are your thoughts?  Like it?  Used it before?  Seen it before?  Have any other similar things?  Please share with the rest of us!  I know I, for one, would love to hear it!  Happy "Hump Day"!

Tuesday, June 26, 2012

Goodbye Kontactr!

As much as I have used Kontactr to receive feedback over these last few blogging months, it has had its MAJOR downfalls...including (but not limited to) not always receiving messages, receiving messages with no email addresses or contact info in them (because it is a "one-way" service), and so on and so forth....

All of which, have lead me to decide to take Kontactr off of my blog.  Whew.  Yes, it in fact, has taken me a good 3-4 weeks of going back in forth in my head to come to a decision...but, alas, there it is!

SO, moral of the short post:  if you have come to my blog and are looking for my Kontactr form, it no longer exists!  Simply send me an email at my Yahoo account instead!

Thanks, and Happy Tuesday.

P.S.  I really do have one last neat "techy" post from my November Learning Workshop to share.  I just don't have one last little supply yet to complete it....but I will share soon....(GET EXCITED!!)  :)

Wednesday, June 20, 2012

November Learning Intermission-- An "Upcycled" Craft!


I'm taking a quick intermission from all my serious "techy" November Learning knowledge to share with you my quick D.I.Y. Summer Project #2- an "upcycled" chalkboard!

How many times do we see super cheap (or even FREE) older chalkboards at garage sales, thrift stores, or even lying out in the hallways from other teachers?!  But, I'll have to admit, most times they do look pretty "crusty".  (Haha, I just HAD to interject that word...one of my teammates uses it ALL the time, and it always cracks me up!)  So, anyways, why buy a new one (and send the old one to the landfull!) when you can "upcycle"!!!

Here's how!  For this project, you will need:

-1 old, "crusty" chalkboard  (any size)
-felt (any color)
-ribbon (any color)
-hot glue gun
-chalkboard paint (I prefer mine in a spray can...you can get it on Amazon.)


Okay, so now that you have all your supplies, you can begin!  My old chalkboard started out like this:


Now, on to the process!

STEP ONE:  Clean your board really well.  I used a damp paper towel, then went back over it again with Windex.  Don't forget all the edges, because you may want to paint that, too! 

STEP TWO:  Set up a workspace to spraypaint in!  I lay down papers in my garage and put up anything important I don't want "overspray" on. 

STEP THREE:  Lay down your board and put your first coat of paint on!  Here's what my "step three" looks like:


STEP FOUR:  Let your first coat dry and apply a 2nd coat.  Let this dry completely and see how it looks.  You may need a 3rd coat, depending on how sad your board was before.  :)

STEP FIVE:  Let all your paint dry overnight.  Yes, I know the can says "dries in 30 minutes!" buuut its better to be safe than sorry!

STEP SIX:  Plug in your glue gun, and glue your ribbon around the edges of your board.  Don't worry about the corners being perfect, because we will cover those up later on!


STEP SEVEN:  Create some felt flowers, and glue them on the corners!  Don't throw away your scraps, because you can even make some cute, baby flowers to go on there, too!


STEP EIGHT:  Hang and enjoy! :)

Don't you just adore it?  And what a quick and easy project!  I can't wait to hang mine up to use!

*UPDATE:  I've added this fun D.I.Y. to sweet Tara's "Monday Made-It" Linky Party (even though it's Wednesday...)!  Click on over to her blog to see TONS more fun ideas to make!  :)


I'll be back tomorrow with more "high-tech" learning tid-bits from my workshop last week.  But until then, Happy Wednesday!